


Most of how to add music to Canva is a single click: open Audio in the editor sidebar, find a track and select it. It attaches to the design as a strip below the pages and starts playing from the first page.
The three things worth knowing come after that. The track needs trimming to the length of the design, it almost always needs fading so it does not stop dead, and it only survives an export in a format that carries sound. That last one is where most of the disappointment happens.
The short version
Select Audio in the editor sidebar and click a track to add it. Drag the ends of the strip below the pages to trim it, use the speaker icon to set the volume, and open Fade to set a fade in and fade out. Export as MP4 video so the audio comes with it.
Add a track from the Canva library
Canva has its own audio library built into the editor, organised by mood rather than by genre, which suits picking background music quickly.
- Open Audio in the editor sidebar. If it is not showing, it is under the three-dot More button at the bottom of the sidebar.
- Browse or search. Mood chips run along the top, with Trending, Upbeat and other groups below them.
- Preview with the play button on a track before committing to it.
- Click the track to add it. It appears as a coloured strip beneath the page thumbnails.
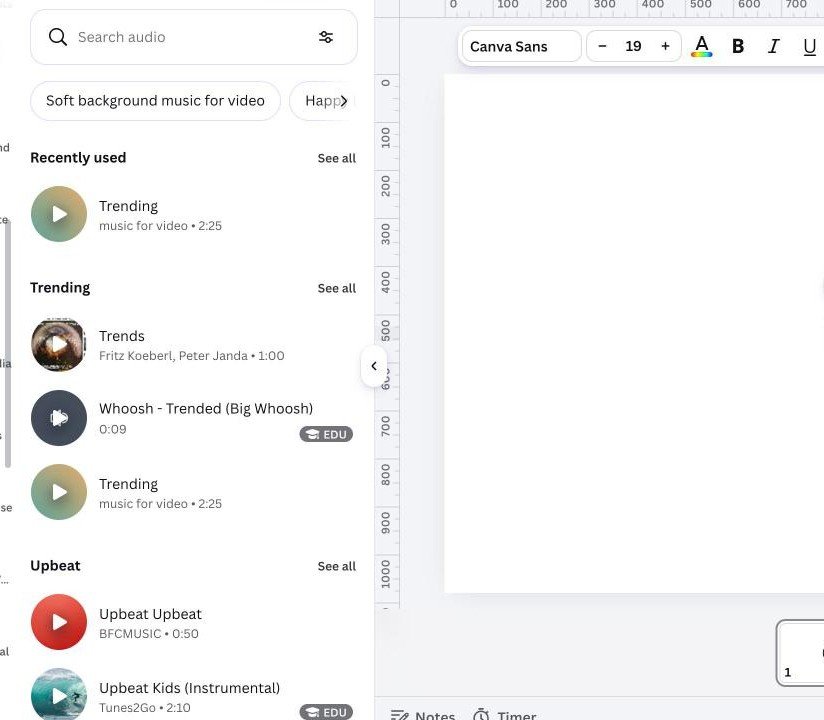
Each entry shows the artist and the running time, and some carry a badge marking them as premium. A track added on a free plan that turns out to be premium will watermark the export, so it is worth noticing the badge before the edit rather than after it.
Canva also shows a notice when you pick something from its popular music collection, warning that those tracks suit personal or internal business use and come with limitations. For anything client-facing or advertised, read that notice rather than closing it.
Use your own audio file
A voiceover, a podcast clip or a track you have licensed elsewhere goes in through Uploads rather than the audio library.
- Open Uploads in the editor sidebar.
- Select Upload files and choose the audio file.
- Once it has finished, open the Audio tab inside Uploads.
- Click the track to drop it into the design.
An uploaded track behaves exactly like a library one from that point, with the same trim, volume and fade controls. The difference is licensing, which becomes your responsibility rather than Canva’s.
Trim, level and fade the track
Selecting the audio strip changes the toolbar above the canvas to the audio controls, and there are more of them than most people expect.
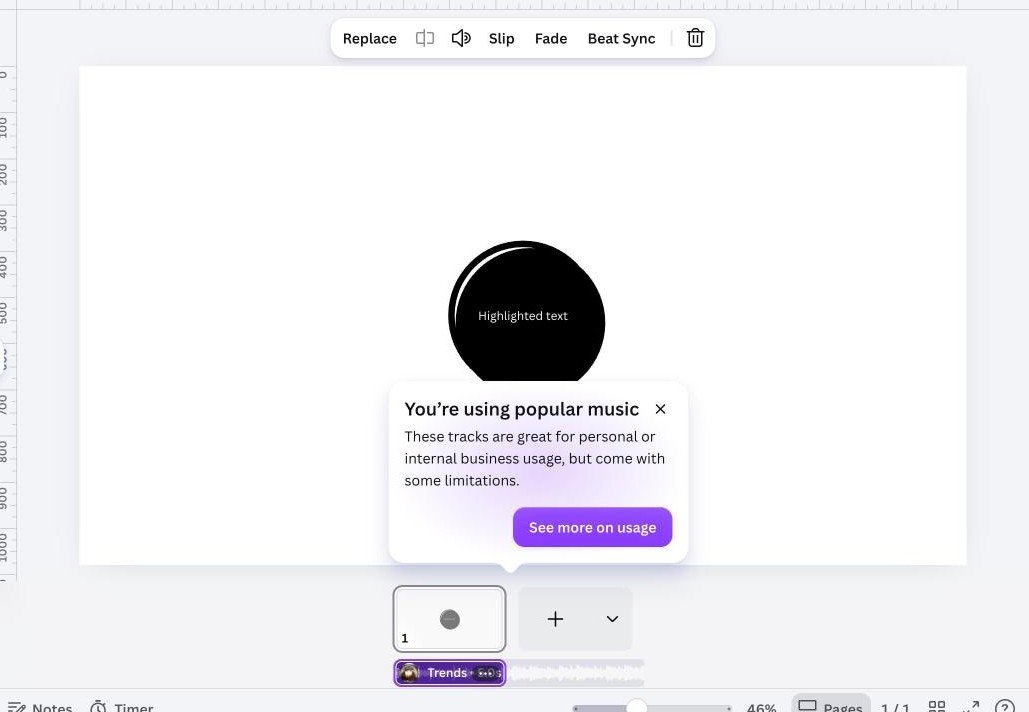
| Control | What it does |
|---|---|
| Replace | Swap the track without losing its trim and volume settings |
| Trim | Drag the ends of the clip to choose which part plays |
| Volume | A slider and a number field, so levels can be matched exactly |
| Slip | Move the audio inside the clip without moving the clip itself |
| Fade | Separate fade in and fade out, each in seconds |
| Beat Sync | Line the page or scene changes up with the beat |
Trimming is done by dragging either end of the strip, which chooses the section of the song that plays. Slip is the one people never find: it slides the audio inside a clip of fixed length, so you can pick a different part of the track without changing where the clip starts or ends.
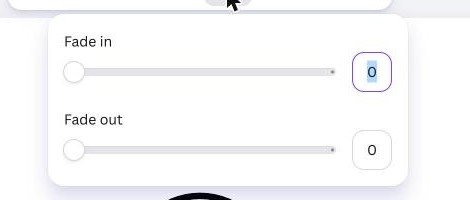
Fade opens its own small panel with a fade in and a fade out, each measured in seconds and set with a slider or by typing a number.
- A fade out of two to three seconds is the single biggest improvement you can make. Music that stops mid-bar sounds broken.
- A short fade in of about a second stops the track hitting the viewer at full volume on the first frame.
- Background music sits low. Under a voiceover, drop it well below the speech rather than trusting it to balance itself.
- Beat Sync is worth trying on a photo montage, since it times the page changes to the track rather than the other way round.
Match the music to the length of the design
Canva trims an added track to the length of the design automatically, which is helpful and occasionally wrong. A five second presentation page will cut a three minute song to five seconds, starting from the beginning.
- Set the page durations first, then add the music, so the trim lands somewhere sensible.
- Use Slip to find the chorus if the opening of the track is a slow build that goes nowhere in five seconds.
- Check the strip against the pages below the canvas, where the audio runs as a bar under the page thumbnails.
- For a long design, a short track will stop rather than loop, so pick something at least as long as the finished video.
Export in a format that keeps the sound
This is where the work is lost. Audio only exists in formats built to carry it, and most of Canva’s download options are not.
| Download format | Keeps audio | Notes |
|---|---|---|
| MP4 video | Yes | The normal choice for anything with sound |
| GIF | No | The format carries no audio at all |
| PNG or JPG | No | Still images, one frame each |
| No | Audio is dropped on export | |
| Present in Canva | Yes | Plays live from the browser |
MP4 video is the answer in almost every case. A design with music downloaded as a PNG or a PDF produces exactly what those formats can hold, which is pictures, and nothing in the export warns you that the sound has gone.
The same logic applies to anything printed. A PDF book cannot carry a soundtrack, so a design built for both screen and print needs two exports rather than one.
Which designs can take audio at all
Not every Canva design type supports it, and the ones that do are broader than people assume.
- Presentations, where the track plays across slides as they advance.
- Social media designs, which is the most common use and the reason most people look this up.
- Videos, where audio is the point rather than an addition.
- Whiteboards and print designs, which can hold audio even though the printed output obviously cannot reproduce it.
A presentation with music is worth testing in Present mode before an event, since that plays the audio live from the browser rather than from an exported file, and a autoplay block in the browser is better discovered in advance.
Choosing a track that suits the design
The library is large enough that picking by ear alone takes longer than the rest of the edit. A few constraints narrow it fast.
- Match the energy to the cut rate. Fast pages need a track with a clear beat; a slow photo sequence needs something without one, or the mismatch is all anyone notices.
- Avoid tracks with vocals under speech. Two voices competing is the quickest way to make a video unwatchable, however good the song is.
- Listen to the first ten seconds, not the whole thing. On a short design that is all anybody will ever hear.
- Check it ends somewhere. A track that builds for a minute is wasted on a fifteen second clip, and a fade cannot rescue it.
The mood chips along the top of the panel are more useful than the search box for this. Searching by instrument or genre assumes you already know what you want, while the mood groups are organised the way a design brief usually is.
Layering a voiceover over music
Two tracks is where the controls start to earn their place, because the balance between them is the whole job.
- Add the voiceover first, as an upload, and leave its volume alone.
- Add the music second, so it sits as a separate strip underneath.
- Drop the music volume well below the speech, using the number field so the setting can be repeated on other designs.
- Fade the music in before the voice starts and out after it finishes, so the speech never has to fight a sudden change.
A useful check is to listen on a phone speaker rather than headphones. Background music that sits comfortably under speech on good headphones often drowns it completely on the device most people will actually watch on, and that is the version that matters. Our roundup of free screen recorders covers the same problem from the capture side.
Frequently Asked Questions
Is Canva music free to use?
Some of it. Tracks carrying a premium badge need a paid plan, and Canva flags its popular music collection as suited to personal or internal business use with limitations attached. Check the badge and the notice before using anything commercially.
Why can I not hear the music in my download?
The file was almost certainly saved as a PNG, GIF or PDF, none of which carry audio. Download as MP4 video instead.
Can I add more than one track?
Yes. Additional tracks stack as separate strips, each with its own trim, volume and fade, which is how a voiceover is layered over background music.
How do I make the music quieter under a voiceover?
Select the music track, open the volume control and set it with the number field rather than the slider, which makes it repeatable across several designs.
Related Articles

Get the Fox Bulletin briefing
The stories that matter, in your inbox. No spam, unsubscribe anytime.
Newsletter signup will be available soon.
Related stories

How to Highlight Text in Canva Three Different Ways
One effect does it in two clicks, and its three sliders decide whether the result looks like a marker pen or a solid block.

Connected Carousel in Canva: Build One That Lines Up
The design half is one wide canvas. The half that stops people is the split, because Canva has no built-in command for it and the answer is an app.

How to Create a QR Code in Canva That Keeps Working
The code takes a minute. Choosing between a static and a dynamic one is the decision that matters, because only one of them can be repointed after printing.