

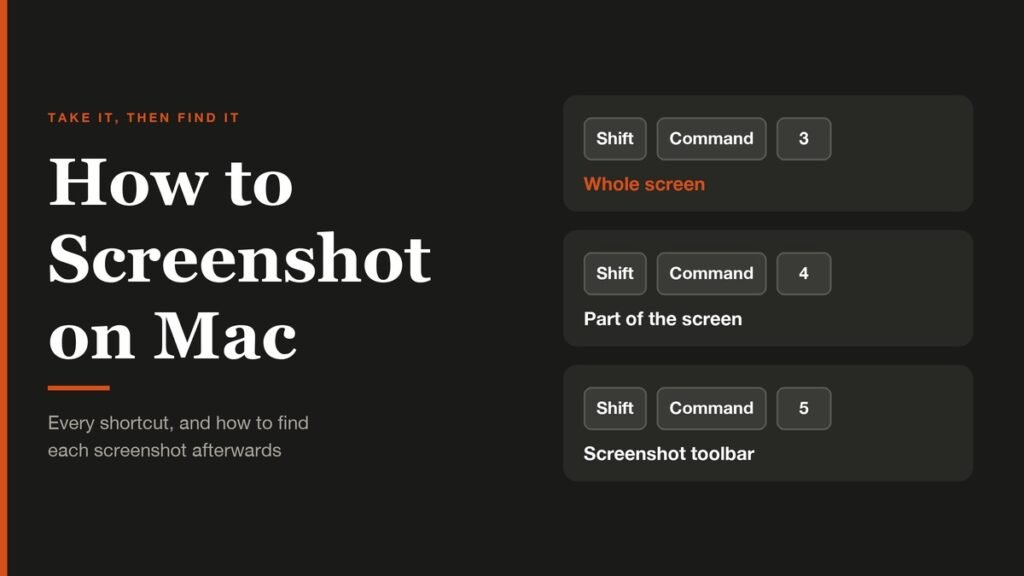
Learning how to screenshot on Mac takes about a minute, because it comes down to three keyboard shortcuts. Finding those screenshots a week later is the part people actually struggle with: they pile up on the desktop, get dragged into project folders, or sync away to iCloud. This guide covers both halves.
By the end you will be able to capture the whole screen, a window or any area you choose, know exactly where each file went, and pull every screenshot on the Mac into one list. Allow two minutes the first time.
The Short Answer
Quick version: press Shift-Command-3 for the whole screen, Shift-Command-4 to drag out an area, or Shift-Command-5 for the full toolbar. Files land on the desktop as PNGs named “Screenshot” plus the date and time. To find all of them, search Finder for kMDItemIsScreenCapture:1.
What You Need
- A Mac running macOS 27 Golden Gate. The shortcuts are the same on recent earlier versions, and the Screenshot toolbar has been there since macOS Mojave.
- Spotlight indexing switched on, which it is by default. The search methods below depend on it.
- Terminal, in Applications > Utilities, only if you want the command-line method.
How to Screenshot on Mac With Keyboard Shortcuts
Apple lists every shortcut in its guide to screenshots on Mac. These are the ones that matter day to day.
| Shortcut | What it captures | Where it goes |
|---|---|---|
| Shift-Command-3 | The whole screen | A PNG file, on the desktop by default |
| Shift-Command-4 | A portion you drag out | A PNG file, on the desktop by default |
| Shift-Command-4, then Space bar | One window or the menu bar | A PNG file, on the desktop by default |
| Shift-Command-5 | Opens the Screenshot toolbar | The folder chosen under Options > Save to |
| Shift-Command-6 | The Touch Bar, on Macs that have one | A PNG file, on the desktop by default |
| Add Control to any of the above | The same capture | Clipboard only, no file |

To capture the whole screen:
- Press Shift-Command-3 together. Check: a thumbnail slides into the bottom-right corner of the screen.
- Wait a few seconds, or swipe the thumbnail to the right to save it immediately. Check: a file named “Screenshot” with today's date appears on the desktop.
To capture part of the screen or a single window:
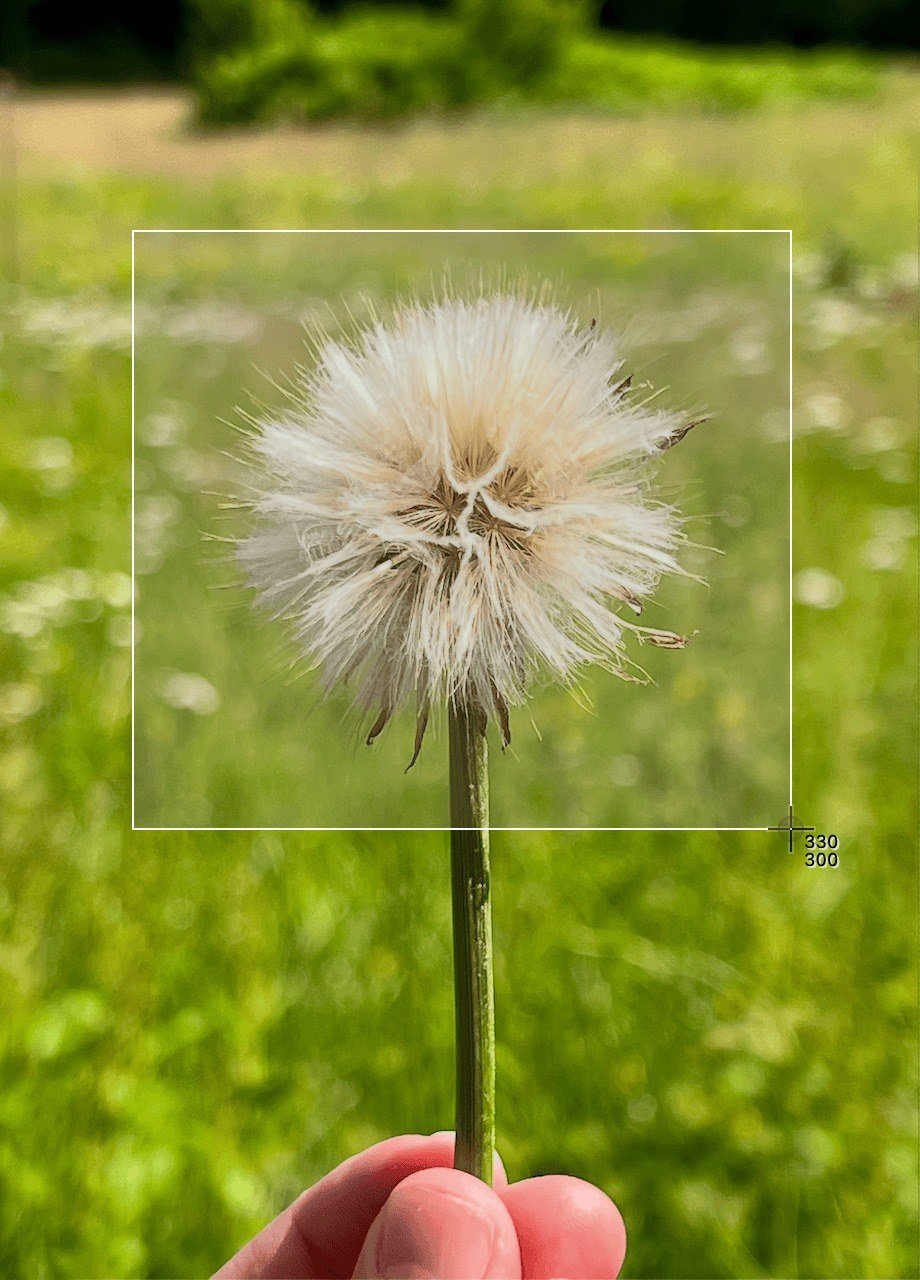
- Press Shift-Command-4. Check: the pointer turns into a crosshair.
- Drag across the area you want, then let go. Check: the thumbnail appears as soon as you release.
- For a whole window instead, press the Space bar after step 1, move the camera pointer over the window, and click. Check: the window is captured on its own, without the desktop behind it.
Use the Screenshot Toolbar for More Control
Shift-Command-5 opens Screenshot, the toolbar version of the same tools. It adds the options the shortcuts cannot: a timer, the mouse pointer, screen recording, and a choice of where files are saved.
- Press Shift-Command-5. Check: a toolbar appears near the bottom of the screen.
- Click a capture button: entire screen, a window, or a selected portion.
- Click Options to set a timer, show the mouse pointer, or change the save location.
- Click Capture. Check: the thumbnail appears, as with the shortcuts.
The Options menu also holds Show Floating Thumbnail. With it on, each screenshot waits in the corner for a few seconds before saving, which is useful for dragging it straight into an email or a note.
Screenshot Options Worth Changing
The Options menu in the Screenshot toolbar is where the defaults live. A few of them change how every later capture behaves:
- Timer: waits before capturing, so you can open a menu or hover over something first.
- Show Mouse Pointer: includes the pointer, which helps when the screenshot is a how-to step.
- Remember Last Selection: reuses the last area you dragged out, handy for a series of matching captures.
- Capture Format: HDR keeps extra brightness and colour on HDR displays; SDR is the safer choice for anything you will share.
The same toolbar records video. Its record buttons capture the whole screen, a window or a portion, and you stop a recording from the button in the menu bar. Recordings save as .mov files named “Screen Recording” with the date and time.
If the default shortcuts clash with an app you use, change them in System Settings: click Keyboard, then Keyboard Shortcuts, then Screenshots in the sidebar. Any of the capture actions can be given a new key combination there.
Where Mac Screenshots Are Saved
Unless you change it, every screenshot is saved to the desktop as a PNG. The name starts with “Screenshot” and includes the date and time, so a file taken this morning sorts next to everything else from today. Older versions of macOS used “Screen Shot” as two words, which is worth remembering when you search an older Mac.
Two settings can make the desktop look empty even though the files are there:
- A different save folder. If someone chose another folder in the Screenshot toolbar, the files go there instead. Press Shift-Command-5, click Options and read the location under Save to.
- Desktop in iCloud Drive. With Desktop & Documents Folders switched on, the desktop is moved into iCloud Drive. If Optimise Mac Storage is also on, older files can be stored only in iCloud until you open them.
How to Find All Screenshots on Your Mac at Once
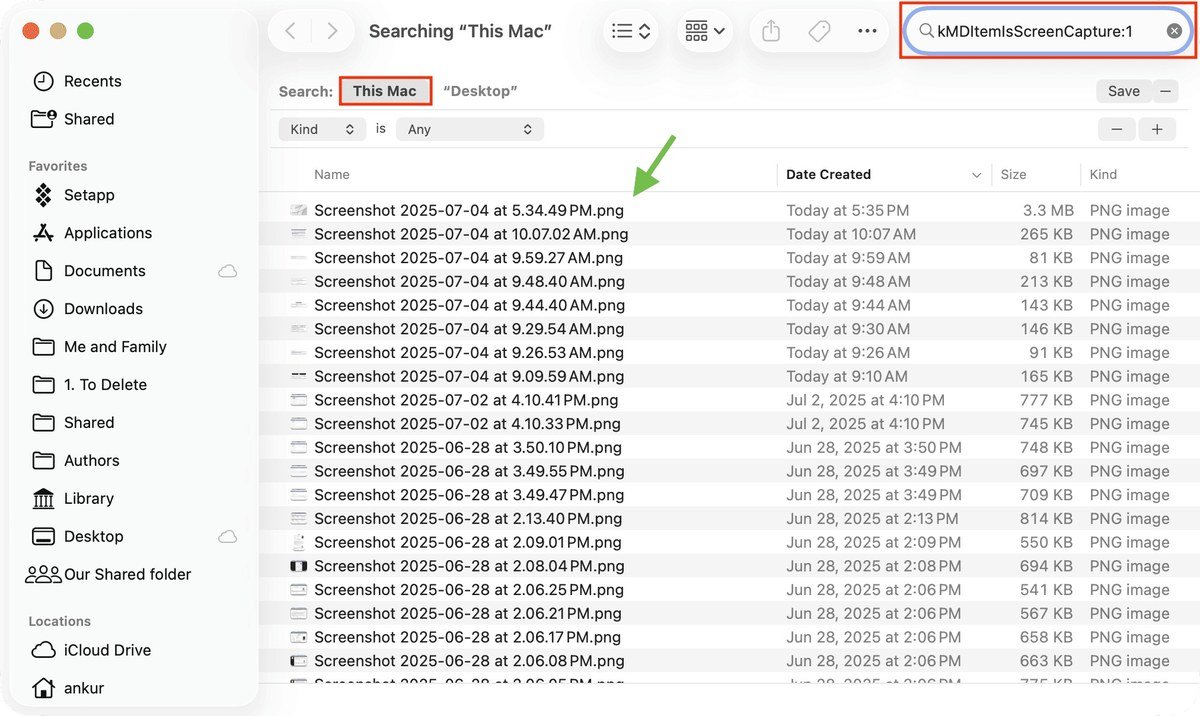
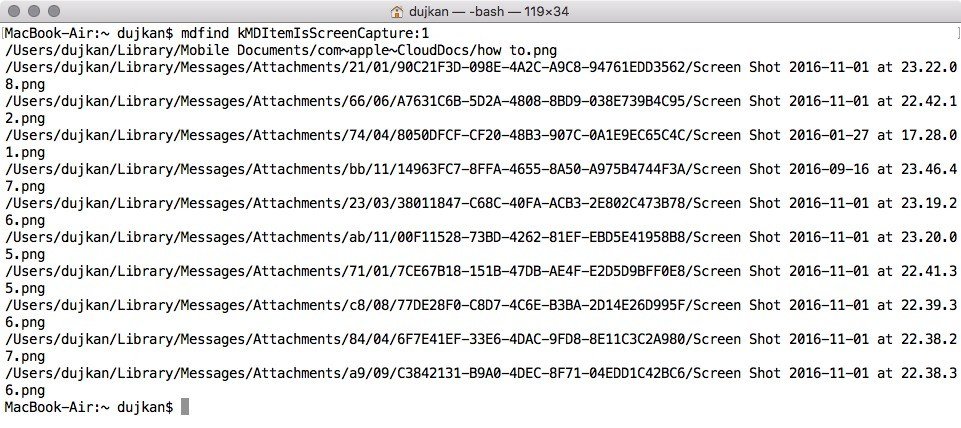
macOS marks every screenshot it saves with a hidden metadata tag, kMDItemIsScreenCapture. Searching for that tag finds screenshots wherever they ended up, even after they were renamed or moved into other folders.
With a Finder search
- Click the desktop, then press Command-F, or choose File > Find. Check: a Finder window opens with a search bar.
- Next to Search, click This Mac so the whole drive is included.
- Type
kMDItemIsScreenCapture:1into the search field at the top right. Check: the window fills with screenshot files from every folder.
Save it as a smart folder
- With the search still open, click Save under the search field.
- Name it, for example “All Screenshots”, and leave Add To Sidebar ticked.
- Click Save. Check: the folder appears in the Finder sidebar and updates itself as you take new screenshots.
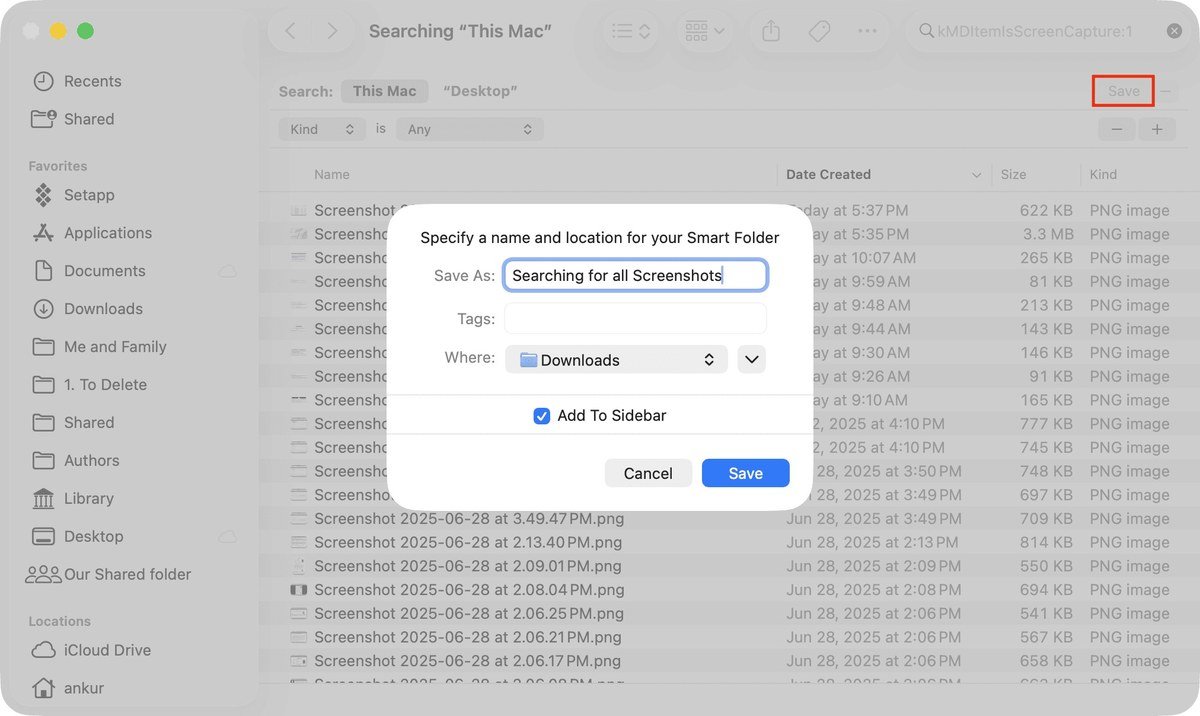
The smart folder holds no files of its own. It is a saved search, so deleting a screenshot from it deletes the original.
With Spotlight
Press Command-Space and type screenshot for a quick list. For a precise one, type kMDItemIsScreenCapture:1 and add a filter: kind: PNG limits it to PNG files, and part of a date such as 2026-10 narrows it to that month. Press the Space bar on a result to preview it, or hold Command to see where it is stored. Spotlight reads the same index that Finder uses, so the results match.
With Terminal
- Open Terminal from Applications > Utilities.
- Type
mdfind kMDItemIsScreenCapture:1and press Return. Check: Terminal prints the full path of each screenshot, one per line.
Two Mistakes That Make Screenshots Disappear
- Holding Control by accident. Control-Shift-Command-3 or -4 copies the screenshot to the clipboard and saves no file at all. If a capture seems to vanish, paste into a document before you take another one.
- Hiding folders from Spotlight. Folders listed under Spotlight's privacy exclusions are skipped by every search above, so a screenshot saved there will not appear. Remove the folder from the list, or browse it in Finder directly.
Once the smart folder exists, it is also the fastest way to clear out old captures: select the ones you no longer need and move them to the Trash in one go. If the clean-up is part of a wider effort, our guide on speeding up a slow Mac covers the other usual causes of a sluggish machine.
Frequently Asked Questions
Why are my Mac screenshots not on the desktop?
Either the save location was changed in the Screenshot toolbar, or your desktop is stored in iCloud Drive. Check Shift-Command-5, then Options, then Save to. If iCloud is involved, you need to be signed in to the same Apple Account, and our guide to resetting an Apple Account password helps if you are locked out.
Can I change the Mac screenshot file format?
Screenshots save as PNG, and the Screenshot toolbar has no file format setting. To get a JPEG, open the screenshot in Preview, choose File > Export and pick JPEG as the format.
How do I screenshot on a Mac without a keyboard?
Open Screenshot from Spotlight or from Applications > Utilities, then click a capture button in the toolbar. It works entirely with the mouse or trackpad.
Does the Spotlight search find screenshots I renamed?
Yes. The screen-capture tag is stored with the file itself, so it survives a rename or a move to another folder on the same Mac, and a screenshot renamed “invoice” still shows up. If you prefer keyboard tricks for symbols as well, our emoji meanings guide covers the Fn/Globe-E character viewer.
Related Articles

Get the Fox Bulletin briefing
The stories that matter, in your inbox. No spam, unsubscribe anytime.
Newsletter signup will be available soon.
Related stories
Second Monitor Not Detected? Fixes for Common Multi-Monitor Problems
A second monitor that shows no signal is usually a cable, input or display mode problem. Here is the fix for that and every other common multi-monitor headache.
How to Scan Mac for Malware: A Complete Step-by-Step Check
Macs scan themselves, but not on demand. Here is how to check a Mac for malware by hand, which free tools help, and the 2026 copy-paste scam to watch for.

How to Split Screen on iPad: Side by Side, Slide Over and More
Split screen on iPad now lives inside Windowed Apps. Here is how to put two apps side by side, resize them, float a third in Slide Over and go back to one app.